This cotton fabric features a breathtaking Northern Lights panel, with ribbons of green, blue, and violet drifting over snow-capped peaks and forest silhouettes, capturing a night sky that feels both magical and serene; the panel layout is perfect for wall hangings, quilt centers, and...
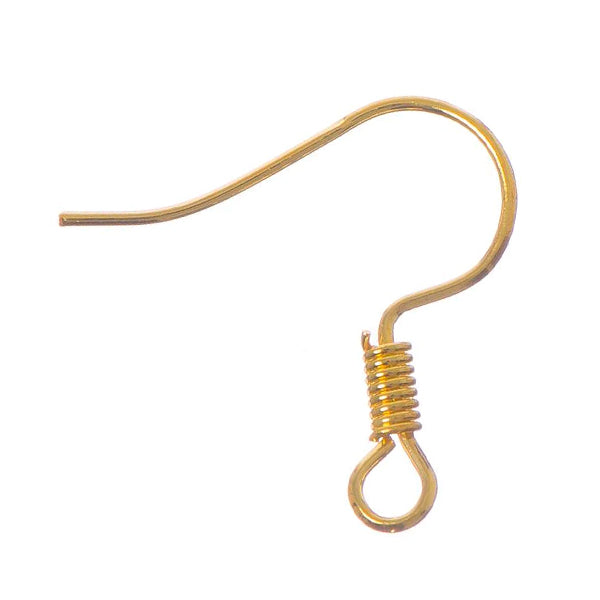
Add a high-quality, professional finish to your handmade earrings with these 925 sterling silver ear hooks. Crafted from genuine sterling silver, they offer excellent durability, skin-friendly comfort, and a bright, polished shine that complements any design. Each hook features a smooth round bead and...
Add a high-quality, professional finish to your handmade earrings with these 925 sterling silver ear hooks. Crafted from genuine sterling silver, they offer excellent durability, skin-friendly comfort, and a bright, polished shine that complements any design. Each hook features a smooth round bead and...
Crystal Lane Beads Style: Rondelle Size: 6mm x 8mm Colour: Transparent Yellow Qty/Pkg: 2 x 7" Strands (approx 58 pieces) Description: These Crystal Lane brand beads are sparkling faceted donut shaped rondelle beads. Available in a broad spectrum of colours and sizes. Glass bead...
Crystal Lane Beads Style: Rondelle Size: 6mm x 8mm Colour: Opaque Black Qty/Pkg: 2 x 7" Strands (approx 58 pieces) Description: These Crystal Lane brand beads are sparkling faceted donut shaped rondelle beads. Available in a broad spectrum of colours and sizes. Glass bead...
Crystal Lane Beads Style: Bicone Size: 4mm Colour: Transparent Green AB Qty/Pkg: 2 x 7" Strands (approx 96 pieces) Description: These Crystal Lane brand beads are sparkling faceted bicone shaped beads. Available in a broad spectrum of colours and sizes. Glass bead double strands...
Bead embroidery attaches beads to a fabric or foundation with needle and thread. The surface supports the design, so you can draw a shape and build it a few beads at a time.
The front
Foundation holds the stitches.
A firm, sew-through beading foundation is a practical starting point for small jewellery pieces. Choose a colour that works with your beads; tiny spaces may remain visible.
For this first sampler, use a flat piece you can comfortably hold. Keep the design small enough to finish without rushing.
The back
Backing gives a finished surface.
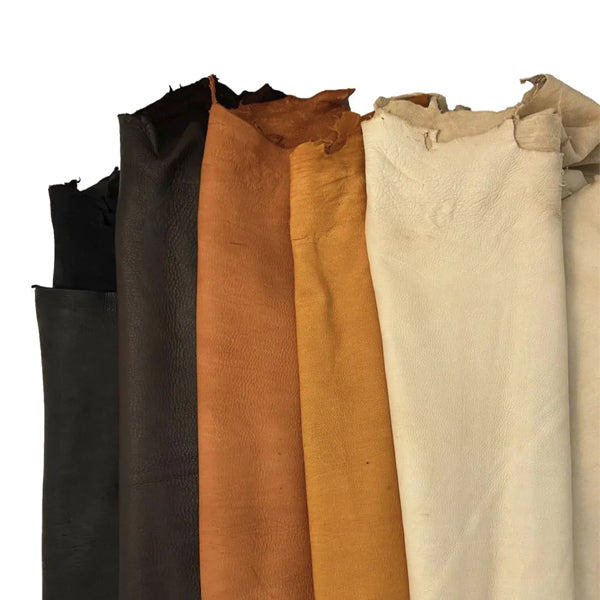
A separate backing covers the reverse-side threads after the embroidery is complete. Soft leather or a suitable suede-type fabric can work; thickness, comfort and ease of stitching matter.
A stiffener is a possible middle layer for a design that needs extra support. It is not the same thing as the foundation or backing.
Start simple: this guide makes a practice sampler with one straight line and one gentle curve. Learn the stitch before adding a cabochon, a clasp or a wearable attachment.
02
A thoughtful starter set.
These are products from our range, sold separately. Open each listing for current availability. One bead colour is enough to learn; a second makes your sampler more playful.
The surface
White GoodFelt foundation
An 8.5 × 11 inch sheet, listed at 1.5 mm thick. Cut a small piece for practice and save the rest.
Gather small sharp scissors, a ruler, a shallow bead tray and good lighting. Use a fine marking tool tested on a scrap of your foundation. Keep marks inside the area you plan to cover.
Handle needles carefully and keep loose beads away from young children and pets. A soft mat helps stop beads rolling away.
Check the whole combination.
Pass the threaded needle through a sample bead several times before you begin. Bead holes, needle eyes and existing thread all affect the fit.
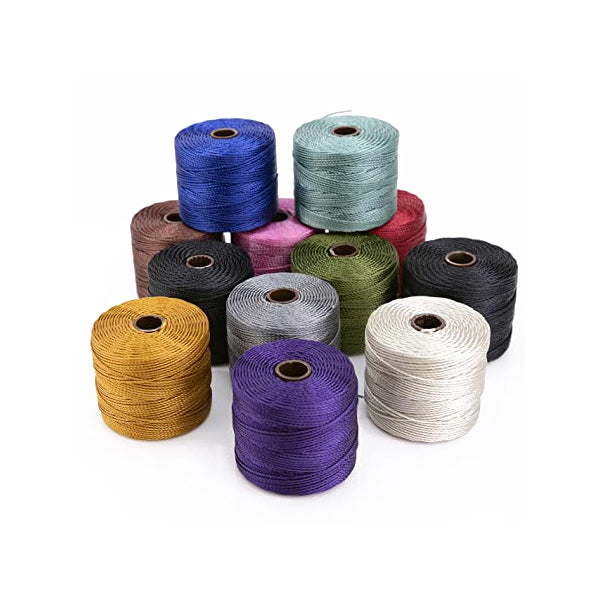
The S-Lon here is fine beadworking thread. A thicker S-Lon cord is a different product and should not be substituted just because the brand name matches. Check bead, needle and thread compatibility →
03
Learn the two-bead backstitch.
Follow the four steps, then repeat the last two. This version overlaps each new pair with the preceding bead to connect the row.
Step 1 of 4
Place the first pair.
Bring the needle up at your starting point. Add beads 1 and 2. Lay them on your drawn line and take the needle down just after bead 2.
Bead order · viewed from above
12
Up at the start → add 1 + 2 → down after 2.
Numbered circles are beads. The highlighted beads belong to this pass.
Step 2 of 4
Reinforce the first pair.
Bring the needle up immediately before bead 1. Pass forward through beads 1 and 2, following their holes.
Bead order · viewed from above
12
Up before 1 → through 1 → through 2.
Numbered circles are beads. The highlighted beads belong to this pass.
Step 3 of 4
Add the next pair.
Add beads 3 and 4. Set them against the previous pair and take the needle down just after bead 4.
Bead order · viewed from above
1234
Add 3 + 4 → down after 4.
Numbered circles are beads. The highlighted beads belong to this pass.
Step 4 of 4
Return through three.
Come up between beads 1 and 2. Pass forward through beads 2, 3 and 4. Continue by adding two beads, then returning through the last three.
Bead order · viewed from above
1234
Up between 1 and 2 → through 2 → 3 → 4.
Numbered circles are beads. The highlighted beads belong to this pass.
Light, even tension: draw the thread in until the beads settle. Stop before the foundation bends. For a gentle curve, place each pair along the line before choosing where the needle goes down.
04
Make a little sampler. Learn a lot.
Tick each stage as you work. The ticks reset when this page is reloaded. There is no fixed bead count: your actual lines and bead sizes determine how many you need.
0 of 6 steps checked.
05
Give the reverse the same care as the front.
For a practice sample, you can leave the back visible so you can study your stitching. For a finished piece, plan the backing and attachment before trimming.
End or replace a thread
Secure it before cutting.
Take the thread to the back. Seat a knot close against the foundation, then add another knot directly against it so it cannot slip through. Check that the row remains settled and the knot holds before trimming the excess.
Start a fresh thread with its own secure anchor. Change thread while you still have enough length to finish comfortably, rather than struggling with a tiny tail.
Plan the edge
Leave room to finish.
Inspect the reverse before cutting the foundation. Keep clear of every stitch and leave enough sound material for your chosen edge finish. Match the backing to the intended use and test whether your needle can pass through the layers safely.
A stitched edge joins foundation and backing. If you use adhesive to position layers, check compatibility and the full cure instructions. Keep it away from the area you will sew.
Your next skill: a basic beaded edge can join the two layers and frame the design. Watch the basic beaded-edge demonstration ↗ before planning a wearable finish. Our adhesive guide helps you check a proposed glue.
06
Small fixes. Better stitches.
Choose what you are seeing, then check the suggestions before adding another row.
Foundation puckers
Ease the tension.
Undo the affected stitches and resew with the foundation resting flat. Draw the thread snug enough to settle the beads without gathering the surface. A tight row is easier to correct now than after backing.
Gaps or lifted beads
Recheck the stitch positions.
Look at where the needle entered the foundation. A gap after each pair can mean the next entry is too far away; crowded beads can lift when there is too little space. Unpick the affected pair and place it again.
Thread tangles or frays
Pause and check the cause.
Untwist the free thread before tightening. Shorten your working length if it repeatedly tangles. Check for rough bead holes and for accidental stitching through an earlier thread. Replace damaged thread instead of covering the problem.
Needle will not pass
Do not force it.
Back the needle out. Check whether the eye and thread, rather than the needle tip, are catching. Test a fresh bead and inspect the layered foundation. A smaller needle alone will not solve a hole already packed with thread.
A few more questions
Do I need an embroidery hoop?
This sampler uses a firm beading foundation that you can hold in your hand. Embroidering a garment is a different setup: consider the fabric’s stretch, stabilisation, bead weight and care requirements before stitching directly onto it.
Can I use smaller beads or beads I already own?
Yes, after testing the combination. Smaller beads make finer lines but may leave less room for repeated thread passes. Work a short scrap sample first. Mixed bead sizes also change the spacing, so place each group before deciding the next stitch position.
Can I add a cabochon next?
Start with a separate sample and plan how the stone will be held. A decorative ring of beads is not automatically a secure setting. Use a suitable bezel or another attachment designed to hold the cabochon, with adhesive only where appropriate for the materials.
How do I care for finished bead embroidery?
Care for the most delicate component: beads, thread, backing, adhesive or findings. Avoid soaking an untested piece. Keep it from catching on clothing, inspect any attachment before wearing, and store it so the embroidery is not crushed.
Can you help me choose a backing or a different combination?
Bring your bead sample, foundation and planned use, or send us the product details. Thickness and handling are worth checking together. Contact i-Bead Inc. → · Read the Needle Guide →
Product Descriptions: i-Bead Inc. strives for accurate product information, but errors may occur. Product availability and specifications, like size, are subject to change.
Product Images: Images are for representation purposes; actual products may vary in appearance due to display settings or manufacturing differences.
Copyright & Intellectual Property: All content on the Website is owned by i-Bead Inc. or its licensors. Users are granted a limited, non-commercial license to view and print content for personal use but cannot reproduce or distribute it without permission.
Trademarks: The i-Bead name and logo are trademarks of i-Bead Inc. Unauthorized use of trademarks is prohibited.
Use of the Website: Users must comply with laws and the Terms. Account creation may be required for certain services. Users are responsible for account security and cannot engage in harmful behavior or unauthorized access.
Pricing & Availability: Prices are listed in Canadian Dollars (CAD) and are subject to change. Additional charges for taxes, shipping, and duties may apply. Out-of-stock products may be removed or delayed.
Limitation of Liability: i-Bead Inc. is not liable for any indirect damages, and the website is provided "as is" without warranties.
Privacy & Data Protection: The use of personal data is governed by the company’s Privacy Policy, which users should review.
Indemnification: Users agree to defend and hold i-Bead Inc. harmless from any legal issues arising from their use of the site or violation of the Terms.
Modifications: i-Bead Inc. can update these Terms at any time. Changes will be effective upon posting.
Governing Law: The Terms are governed by the laws of Ontario, Canada, and any disputes will be resolved in Ontario courts.
Contact Information: For questions, users can contact i-Bead Inc. at their address or via email or phone.
In-Store Purchases: Items can be returned within 30 days with the original receipt for an exchange, store credit, or refund. Must be unopened and in original condition.
Online Purchases: Returns allowed within 30 days of receiving your order. Prior authorization required. Items must be unopened and in original condition.
Non-Returnable Items: Sale items, opened packages, broken strands, cut items (e.g., fabric, ribbon, rhinestone banding, etc), books, patterns, and special orders cannot be returned.
Restocking Fee: Returns after 30 days incur a 20% restocking fee. Clearance/discontinued items cannot be returned after 30 days. Returns initiated beyond 90 days are not eligible for a return or exchange.
Damaged/Defective Items: Contact customer service within 48 hours. Return shipping will be covered, and you can request a refund or replacement.
Return Instructions: Include the reason for the return and your order details. We recommend using a traceable shipping carrier. Returns must be prepaid, and customs fees are not covered.
Refund Process: Refunds will be issued after inspection, minus shipping costs, and may take 1-2 weeks to process.
For returns, the items must be in their original, unopened condition.
Shipping Policy
Shipping rates, eligibility, discounts and exclusions are explained in our Shipping Policy. Available shipping methods and applicable charges are shown at checkout.
Stamped Envelope Shipping — Untracked and Uninsured
Important: Read these limitations before selecting this lower-cost shipping option. Stamped Envelope Shipping uses Canada Post Lettermail, not a tracked parcel service.
Eligibility: Available only for eligible small, lightweight orders delivered within Canada, with a maximum of 10 items and an order value of no more than $24.99 CAD. The complete order must meet the requirements, including Canada Post's maximum Lettermail dimensions of 380 × 270 × 20 mm and maximum weight of 500 g. Having one eligible product in your cart does not mean the entire order qualifies. This shipping method appears at checkout only when the order is eligible.
No tracking or delivery confirmation: A tracking number is not provided. Once the envelope has been mailed, we cannot track its location or independently confirm when it is delivered.
No carrier insurance: Stamped Envelope Shipping does not include coverage for loss or damage, and no insured shipping claim is available through this service. Insurance associated with parcel shipping does not apply to stamped envelopes.
Delivery times are not guaranteed: Lettermail may be slower than expedited parcel shipping. Depending on the destination and postal conditions, delivery may take several weeks.
Customer acknowledgment: By selecting Stamped Envelope Shipping at checkout, you acknowledge that you are choosing an untracked and uninsured method and accept its service limitations and associated risks of delay, loss or damage.
If you want tracking, delivery confirmation or available carrier insurance, select an eligible tracked parcel shipping option instead.
Orders delivered within Canada: Applicable GST/HST is calculated based on the delivery province or territory. Please see our Sales Tax Policy for current rates.
First Nations tax relief: Eligible customers may qualify for GST/HST relief. Please review our Native Status Cards policy for eligibility and application requirements before ordering.
U.S. orders: Shipping to U.S. addresses is temporarily suspended.
International orders (outside Canada and the U.S.): We do not charge Canadian GST/HST on goods shipped outside Canada. Destination duties and taxes may apply and are the recipient's responsibility.
i-Bead Inc.'s Privacy Policy outlines how they collect, use, and disclose personal information. They gather data directly from users (e.g., contact details, order info, payment info) and through tracking technologies (e.g., cookies). This data is used for order processing, marketing, security, and customer support. The company may share data with third-party vendors and partners for service fulfillment, marketing, and legal compliance. Users can access, correct, or delete their data, and opt-out of marketing communications. The policy also covers data security, retention, and international transfers.
Acknowledgment of Terms and Shipping Conditions
By proceeding with checkout, you acknowledge and agree to i-Bead Inc.'s Terms & Conditions and the applicable policies linked above. Delivery estimates are not guarantees; weather, holidays, postal disruptions, and other carrier-related circumstances may cause delays. Shipping services differ in whether they include tracking, delivery confirmation and insurance, so please review the method you select at checkout and our Shipping Policy.
This cotton fabric features a breathtaking Northern Lights panel, with ribbons of green, blue, and violet drifting over snow-capped peaks and forest silhouettes, capturing a night sky that feels both magical and serene; the panel layout is perfect for wall hangings, quilt centers, and...
Add a high-quality, professional finish to your handmade earrings with these 925 sterling silver ear hooks. Crafted from genuine sterling silver, they offer excellent durability, skin-friendly comfort, and a bright, polished shine that complements any design. Each hook features a smooth round bead and...
Add a high-quality, professional finish to your handmade earrings with these 925 sterling silver ear hooks. Crafted from genuine sterling silver, they offer excellent durability, skin-friendly comfort, and a bright, polished shine that complements any design. Each hook features a smooth round bead and...
Crystal Lane Beads Style: Rondelle Size: 6mm x 8mm Colour: Transparent Yellow Qty/Pkg: 2 x 7" Strands (approx 58 pieces) Description: These Crystal Lane brand beads are sparkling faceted donut shaped rondelle beads. Available in a broad spectrum of colours and sizes. Glass bead...
Crystal Lane Beads Style: Rondelle Size: 6mm x 8mm Colour: Opaque Black Qty/Pkg: 2 x 7" Strands (approx 58 pieces) Description: These Crystal Lane brand beads are sparkling faceted donut shaped rondelle beads. Available in a broad spectrum of colours and sizes. Glass bead...
Crystal Lane Beads Style: Bicone Size: 4mm Colour: Transparent Green AB Qty/Pkg: 2 x 7" Strands (approx 96 pieces) Description: These Crystal Lane brand beads are sparkling faceted bicone shaped beads. Available in a broad spectrum of colours and sizes. Glass bead double strands...